
Hyperlapse Video Production
Sep 05, 2017

n this blog I will be taking a look at the who, what, why, when, where and how of hyperlapse video recording. Firstly, let’s look at a basic definition for this increasingly popular production method:
‘Hyperlapse’ – Similar to time-lapse in so much as frames are captured at intervals but the camera enjoys unrestricted movement over large distances eg a 360 degree of an iconic building, a fly through a city landscape or a walk through a busy market. Excellent examples of this can be found here (thank you Geoff Tompkinson)
This is Hyperlapse from geoff tompkinson on Vimeo.
Like time-lapse, hyperlapse image making is yet another tool in the DSLR video maker’s toolkit. It is relatively easy to produce and there are times when this unique method of video production is both essential and quite beautiful.It can be as simple as facing forward and recording a non-stop linear journey eg from the front end of a underground train or walking through a colourful, busy outdoor market, during which a photographic image is recorded every three paces and the images stitched together in post-production. In this article I’d like to explore a more sophisticated and more visually effective form of hyperlapse production.
At the very start I described hyperlapse as time-lapse with unrestricted movement. Pretty much the same technical and creative rules apply eg shoot wide, use a slow shutter speed and an ND filter in daylight. Though hyperlapse is available as an app for mobile devices, it still needs to be considered and crafted in order to be effective as an art form. Again, like time-lapse, you need a purpose, a reason to record in hyperlapse. Subject matter, action, environment, narrative and emotion are still just as important, otherwise, it can so easily become an over indulged video recording effect.
How to record hyperlapse
Chose an interesting object (building), location, event, landscape which allows you movement around or passed it.
Plan your route from its starting point to the finishing point. Man made surfaces such as concrete paths, roads etc are best because they tend to be level and will provide continuity for each shot.
Calculate the distance you will need to travel from start to finish. This can be done simply as using footsteps. Work out how far you want the camera to move between shots. The shorter the distance the smoother the video. Imagine that your travel distance is 480 steps and you are taking an image every 4 steps, that’s 120 images in total. At 24 frames per second, that will be 5 seconds worth of finished video. If using a flagstone path or similar, your set up points can be predetermined by their pattern, eg every three flagstones.
Set up your camera as highlighted in the discussion on time-lapse. Ensure that you are using a sturdy locked off tripod and use a focal length of 25mm to 30mm for a wide angle without distorted edges. Again as with time-lapse, record in RAW. You can use a monopod with three feet if you prefer.
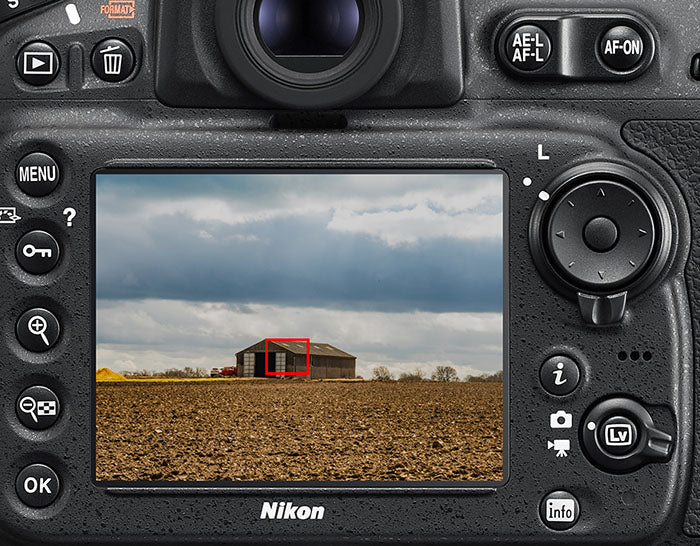
Most live view compatible cameras will display some sort of focus point. This could be red white or green in some cases.
Frame your first shot carefully selecting your main reference point. Mark this as it will remain in the same position on your screen for each shot. The placing of the camera will alter, but the reference point stays where it is. If a foreground object obscures this you will need to make a well calculated guess as to where it needs to be within the frame. Ensure verticals stay….. well, vertical.
Check your settings and take your first shot. Move to the next position, ensure your reference point is correctly framed and take your second shot…..and so on til you reach your predetermined finish point.
It is advisable not to touch the camera when taking the image, to reduce the risk of camera shake. Either use an intervalometer or set the timer on the camera to a couple of seconds.
Keep up the pace…..taking the same amount of time to move to the next location, (usually allow for around 10 secs) frame the shot, shoot, move on. Pace is important here because you are recording live action and therefore need to maintain the continuity of that action.
Tips:
-
keep it manual and record, wherever possible, in a high quality recording format such as RAW (12-14 bits).
-
Use a slow shutter speed.
-
Using an ND filter for daylight recording combined with a slower shutter speed will produce motion blur. This will smooth the joins when it comes to editing.
Post-production
As with time-lapse you could choose either Photoshop or Lightroom for tweaking each image. We went with the latter.
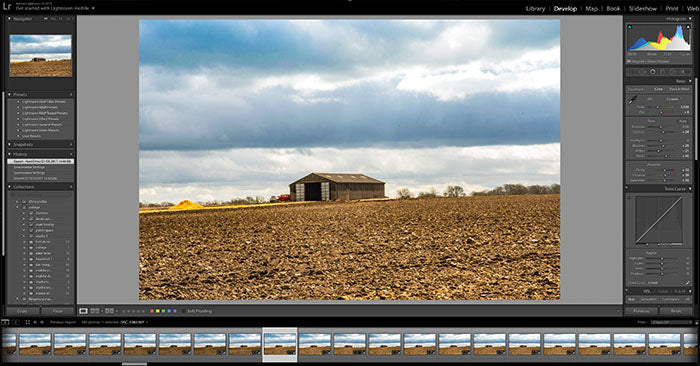 Import your raw images into Lightroom (usually the fastest way for batch editing) select an image and make your adjustments from the panel to suit the look you require. It is a good idea to choose an image in the middle of your sequence for a balanced look.
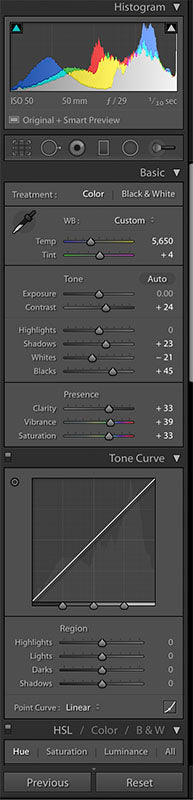
Some basic corrections might include contrast, colour toning, shadows and highlights and a touch of saturation. The tone curve adjustment panel will also allow a good level of control in the image overall. If all else fails there is a pretty decent AUTO correction that usually does a good job but always refer to the histogram and double check as sometimes it can boost highlights a touch too far.
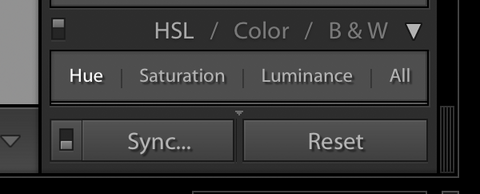
Clicking SYNC will apply the changes you have made in the adjustment panel to all your images. Depending on how many images you have this may take a while.When you are happy with the overall look hit command +A to select all the images in your timeline (control +A on PC) and the PREVIOUS button will change to SYNC.
When finished save your images as jpegs in a new folder.
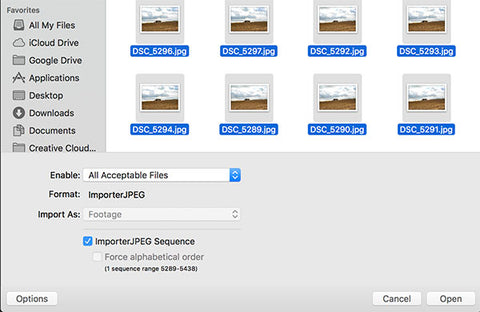
Now import all your files into AfterEffects. Go to File > Import and select your images but make sure you have the option selected to import jpeg sequence. This will ensure all the images will be imported in the order you shot them in – as one sequence and not as multiple images.
Once imported, drag the icon from the project panel onto the new composition icon and the images will appear as one block in the timeline.
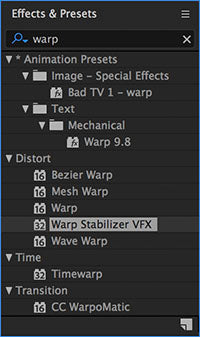
Utilize the warp stabilizer to correct any rough movement or misalignment within the sequence. This can be found under the effects panel, but if you struggle to locate it then just type ‘warp’ into the search bar and it should appear. Drag the warp stabilizer folder icon onto the the timeline bar of your sequence and release. This will then apply the stabilizer to the series. This uses a lot of processing power and can take several minutes to complete.
Finally, finish off in your favourite moving image editing software, adding music (buy some!), titles, save, sigh and export.
Hosting
Best go straight to Vimeo!